How to convert a van into a camper van (budget guide)
Our Story
Our decision to buy and build a van for travel was a rash one. We both had always wanted to do a road trip to the Northern Territory and had planned on hiring a van for the journey. However after hours of research, we discovered that it was going to cost $6,000 to hire a van for the duration of the journey. Therefore on our budget we had to look for an alternative option, thats when Ryan decided to look on Gumtree and buy a van. We were very fortunate enough to come across a 1984 Toyota Hiace, 4 speed petrol, that had done 270,000km, was in very good condition, completely gutted with a timber floor throughout the back and was priced at $2,700, well within our budget. Which we picked up the next day.
First things first, we drew up a plan.
Ryan used a program called “Sketch Up” so we could work out what was going to fit and where. (This is a free program that can be downloaded from the link). The program also helped with the colour scheme and layout we wanted to go with. This all helped out in the end so when it came time to build, we knew exactly what we wanted, the sizes and colours.
The Bed Frame
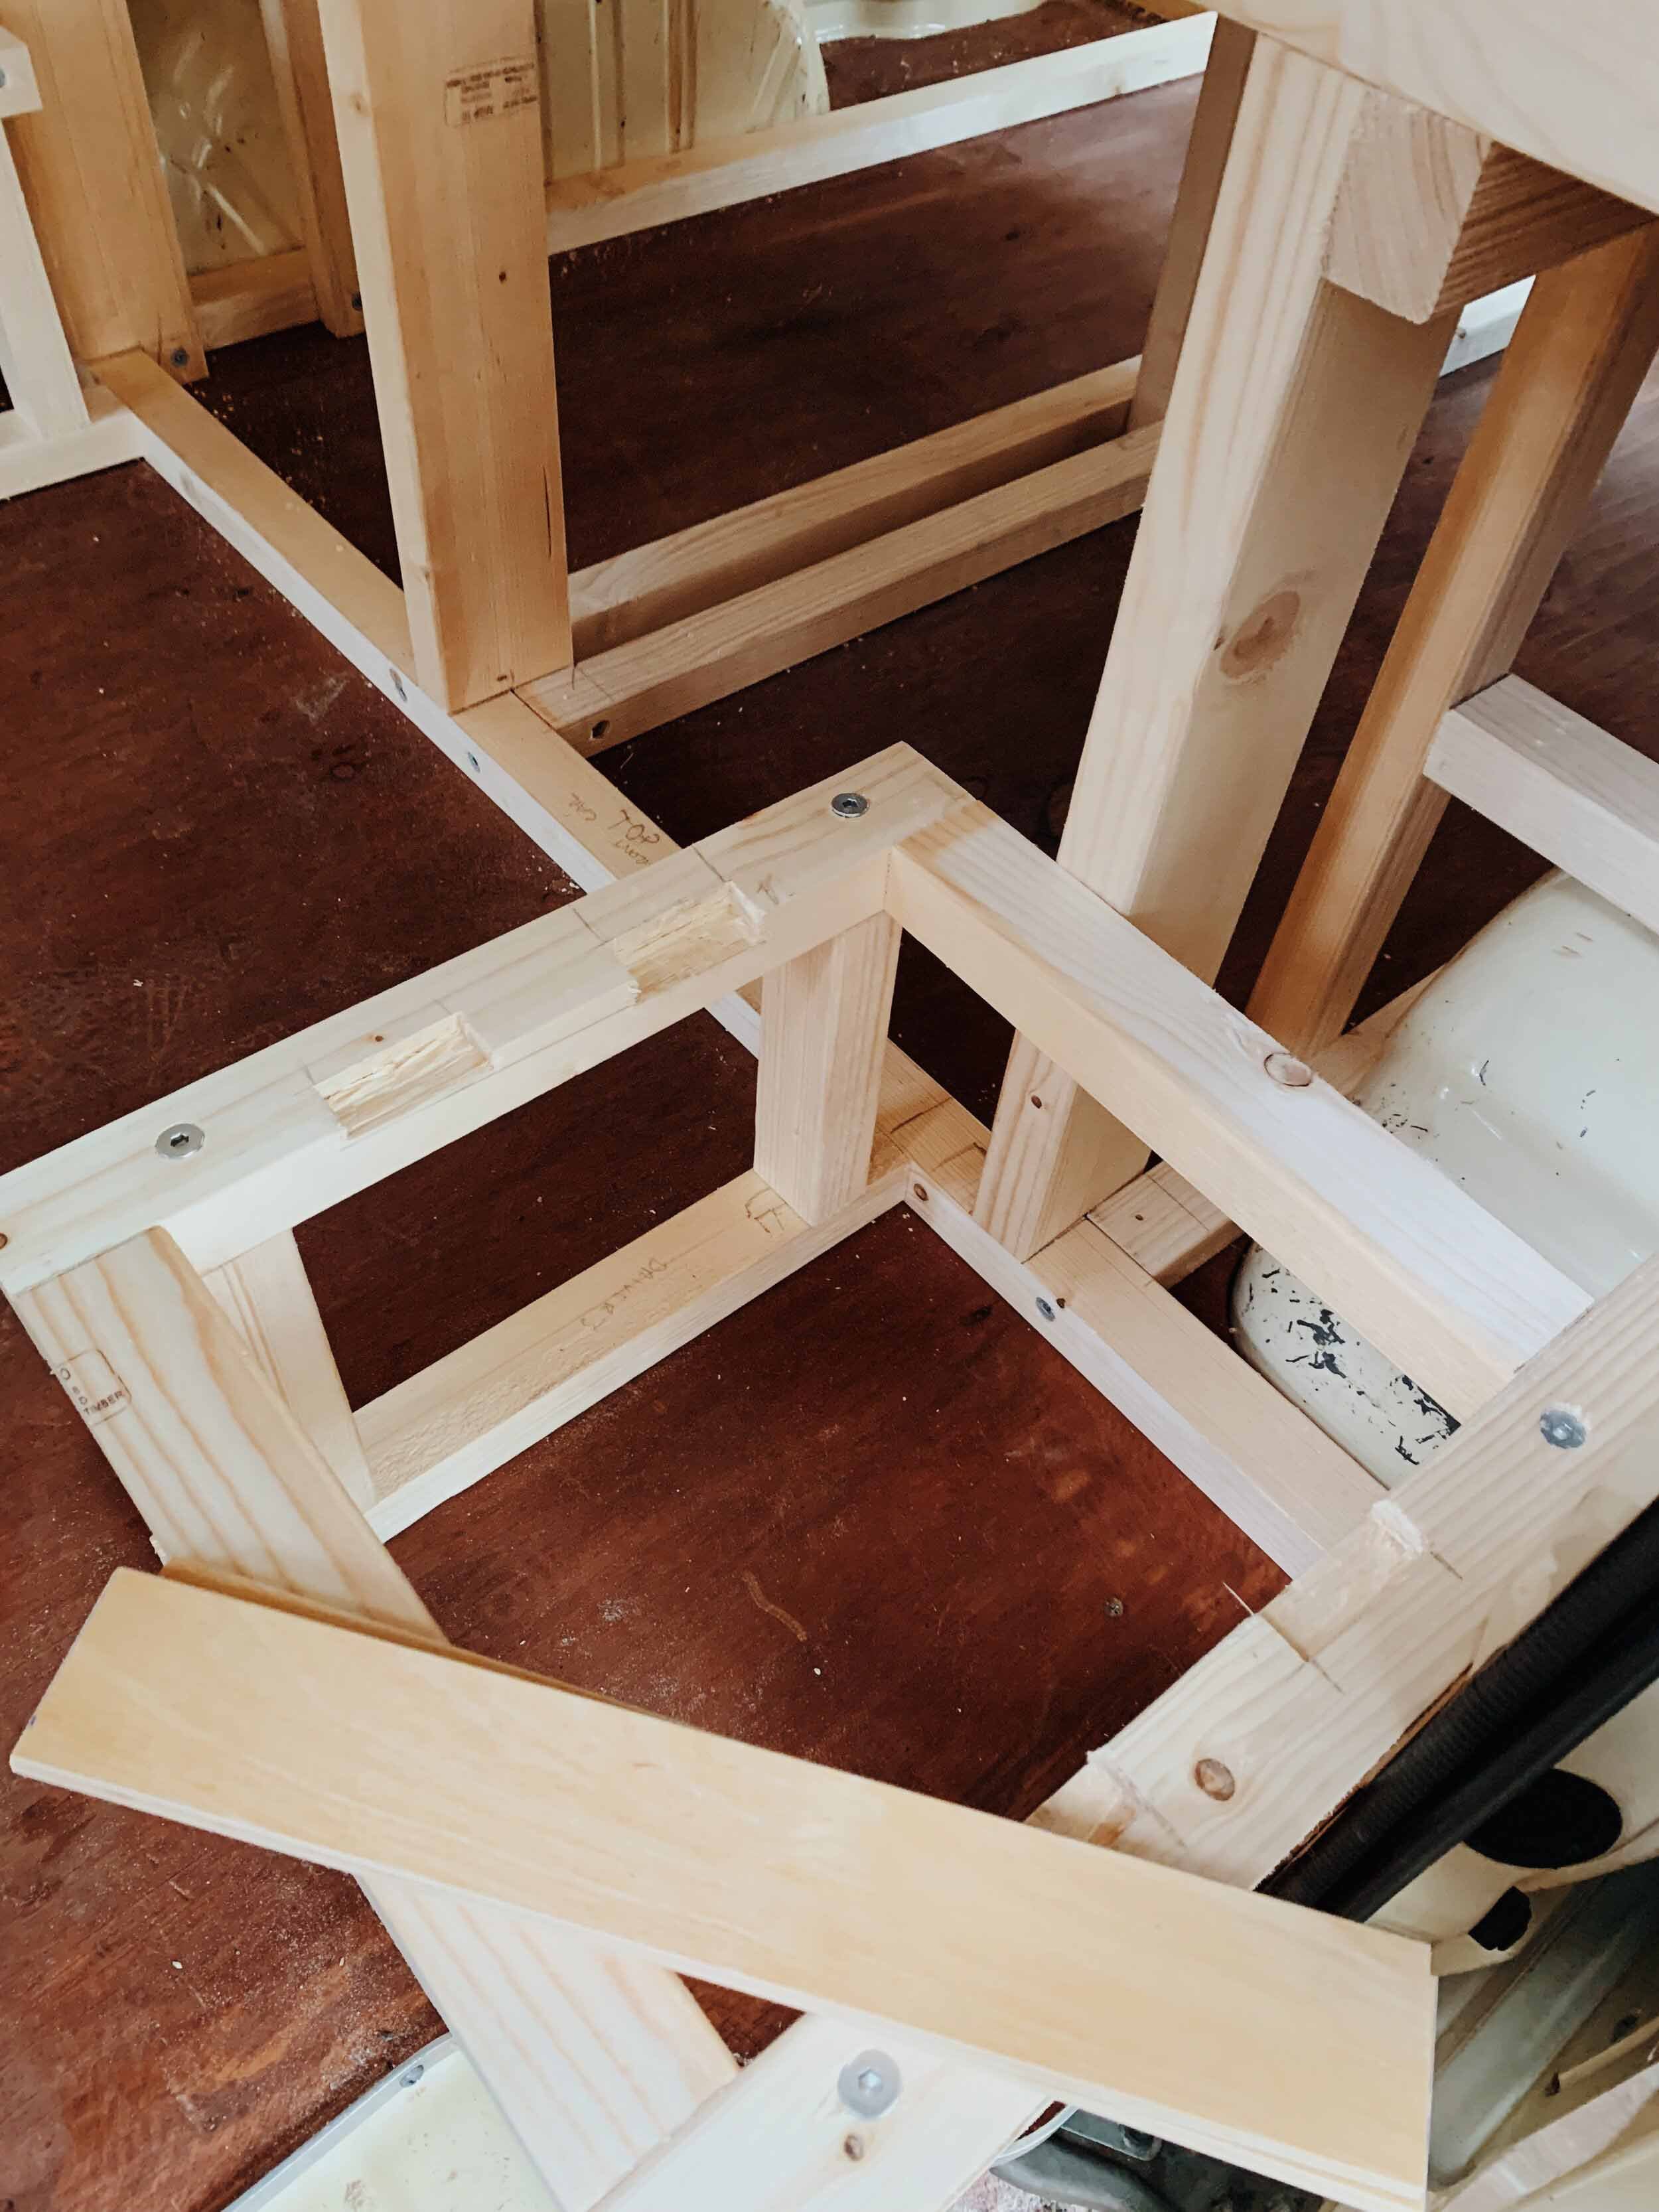
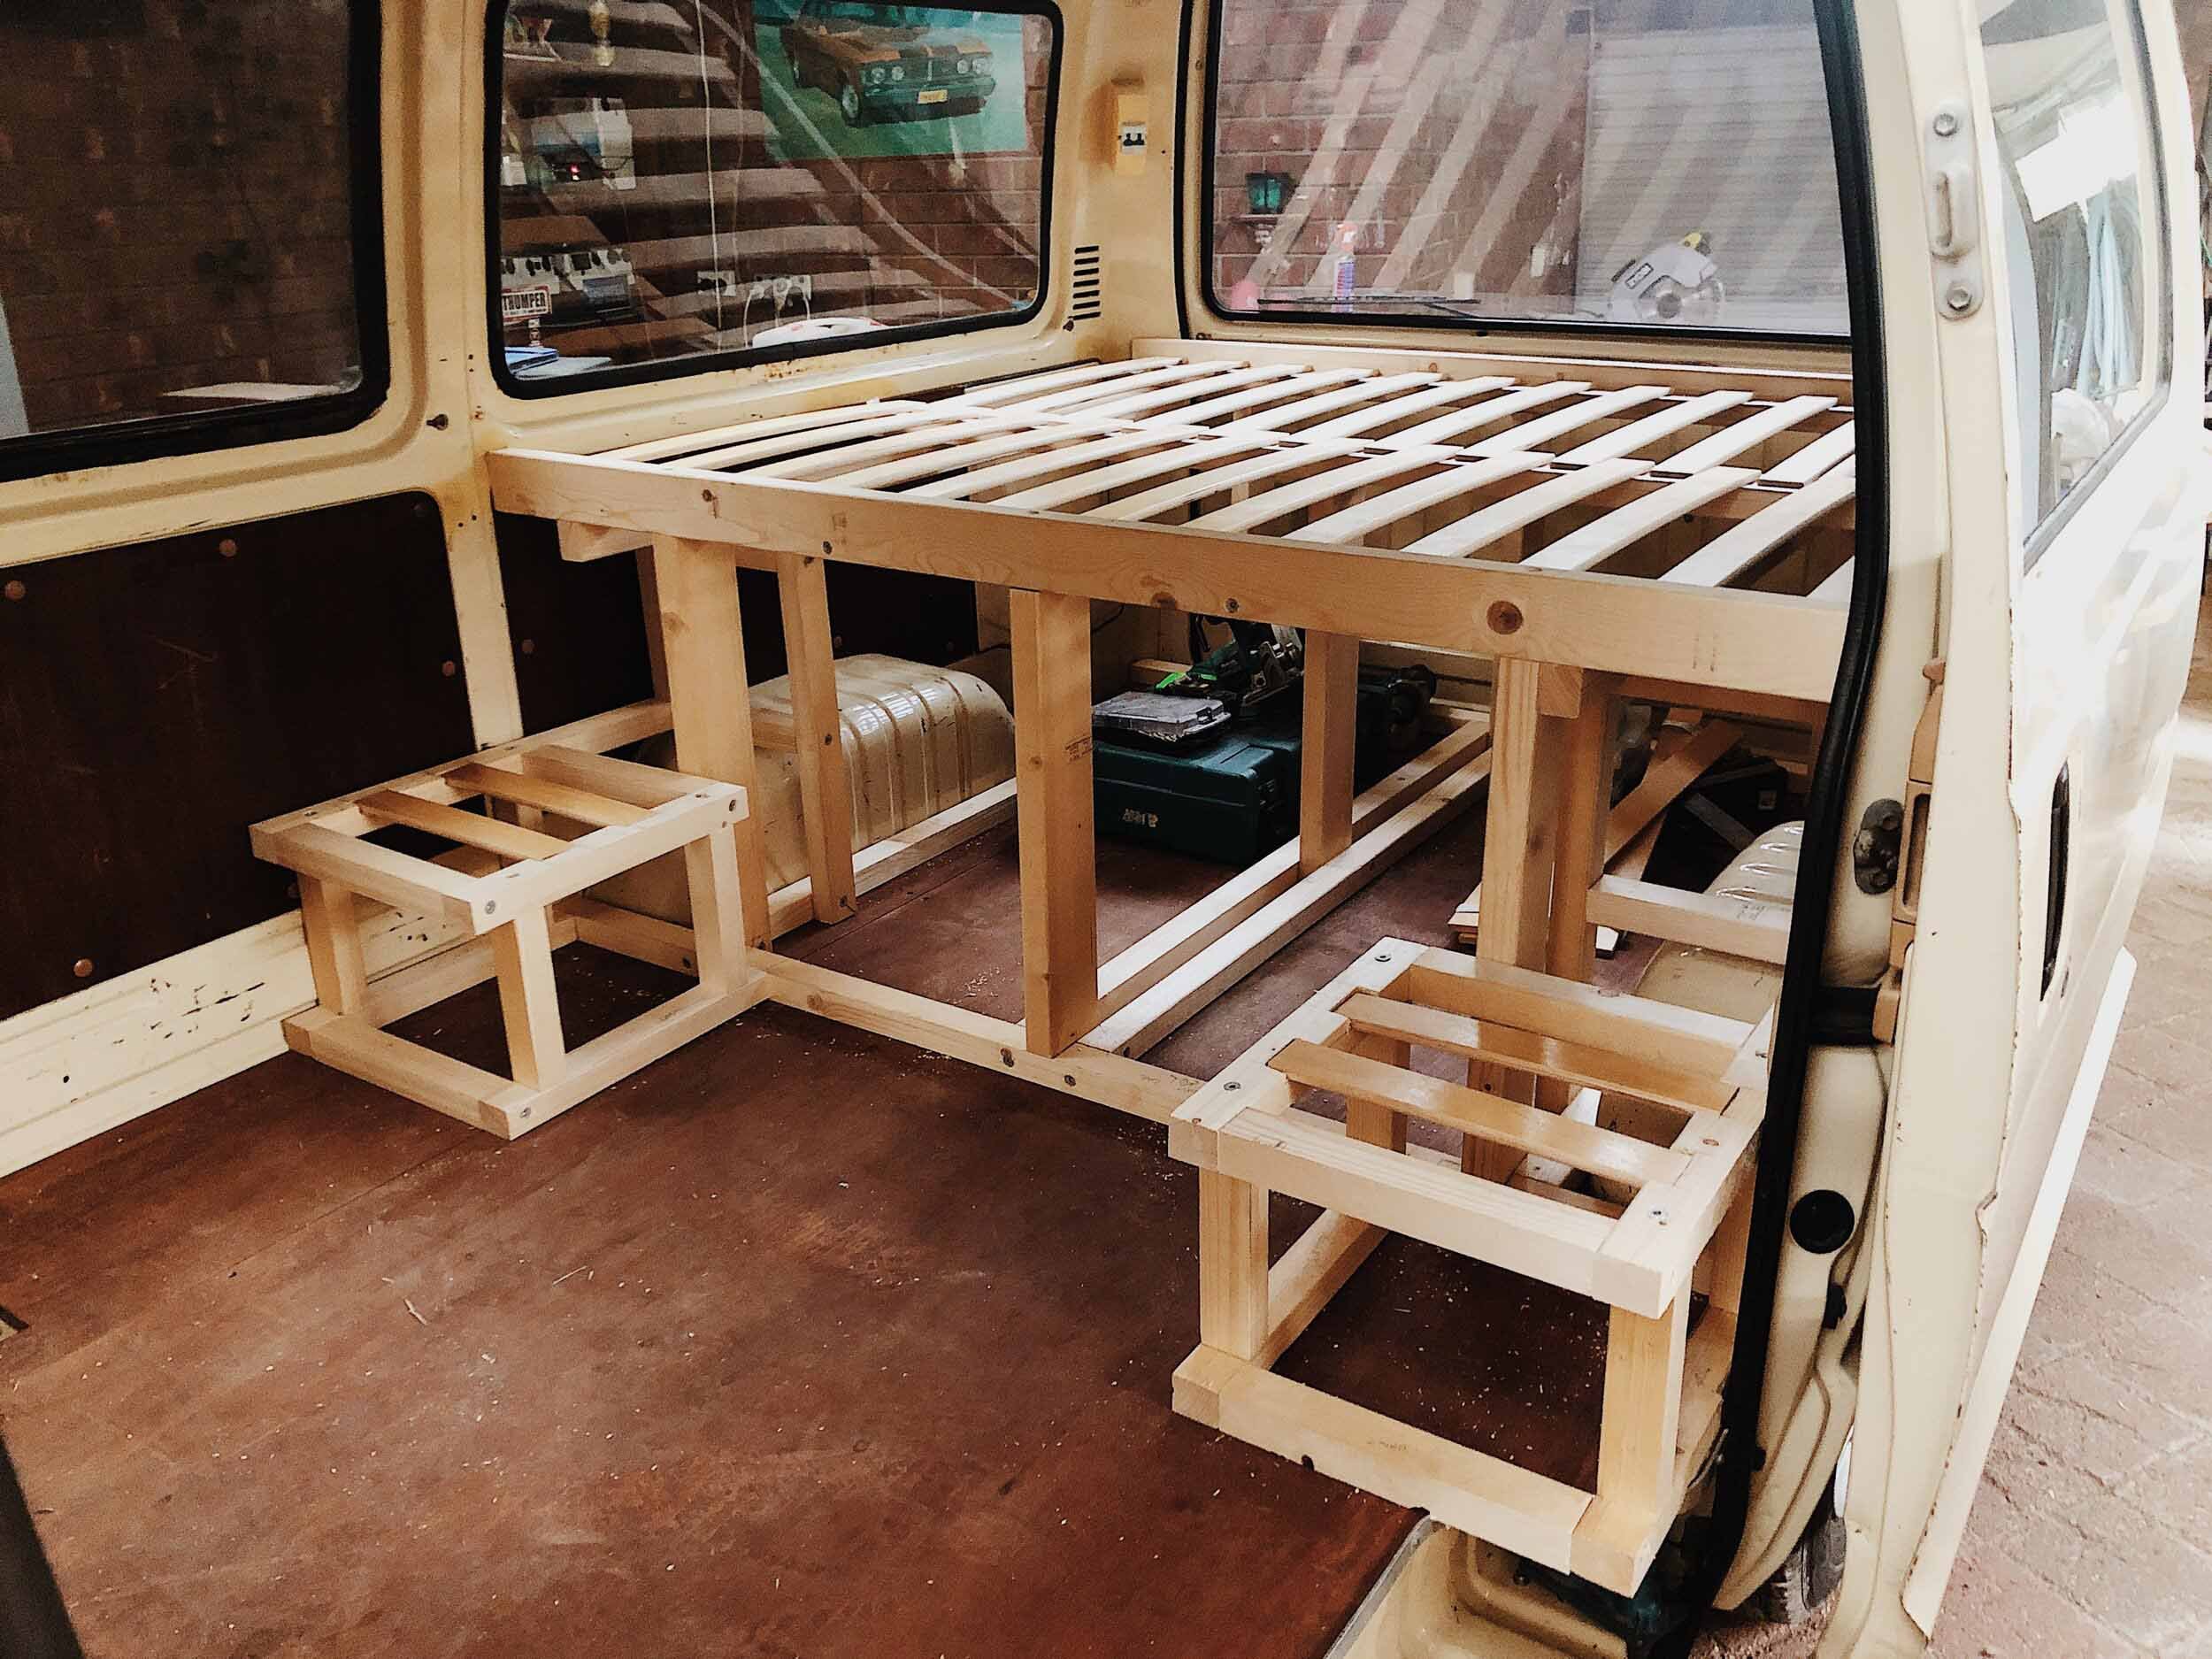
We decided to tackle the bed frame first as we knew it was going to be the main form of support for all the other components. We thought to make the bed frame run perpendicular with the van as it would save a lot of space and wouldn’t intrude the sliding door entrance. However this meant that the bed wouldn’t be long enough for us to sleep stretched out in, unless we came up with a creative solution. We used 90mm x 35mm pine timber framing for the entire bedframe most of which we ripped down to be 45mm x 35mm in order to reduce the total weight of the build. We also purchased 8G 50mm timber screws to secure the frame together. Used queen bed slats purchased from Ikea and a 70mm thick double mattress which we purchased from Clarke Rubber (the full quantity and cost listing is below):
Approx. 25 meters of 90mm x 35mm pine timber framing from Bunnings - $2-$3 a meter
100 x 50mm timber screws from Bunnings - $26
Queen bed slats from Ikea - $60
70mm double mattress from Clarke Rubber - $200
Total Costing: $361
The Chairs
We wanted a place for us to be able to sit inside the comfort of the van, so we decided to add 2 little stalls either side. Both of these stalls screwed directly onto the bed frame which added a little extra support for the bed. Again using the ripped 45mm x 35mm timbers and 50mm screws we made 2 600x600mm stalls. And by using the left over bed slats as removable support beams we were able to use the inside of the stalls for extra storage.
Table Install
The table we installed was one of the best projects we made throughout the entire van build. We decided to make the table fold out from the top beam of the bed frame, centred between the 2 stalls. The 600mm square table also had to have foldable legs in order for it to compact down and fit adjacent to the bed frame. We ended up using a 2200 x 600 x 26mm hard wood project panel which we cut in half, 25mm oak dowel for the legs and made a custom hinge from a steel bracket and 2 x stainless steel split pins (the full quantity and cost listing is below):
Pull out kitchen and storage
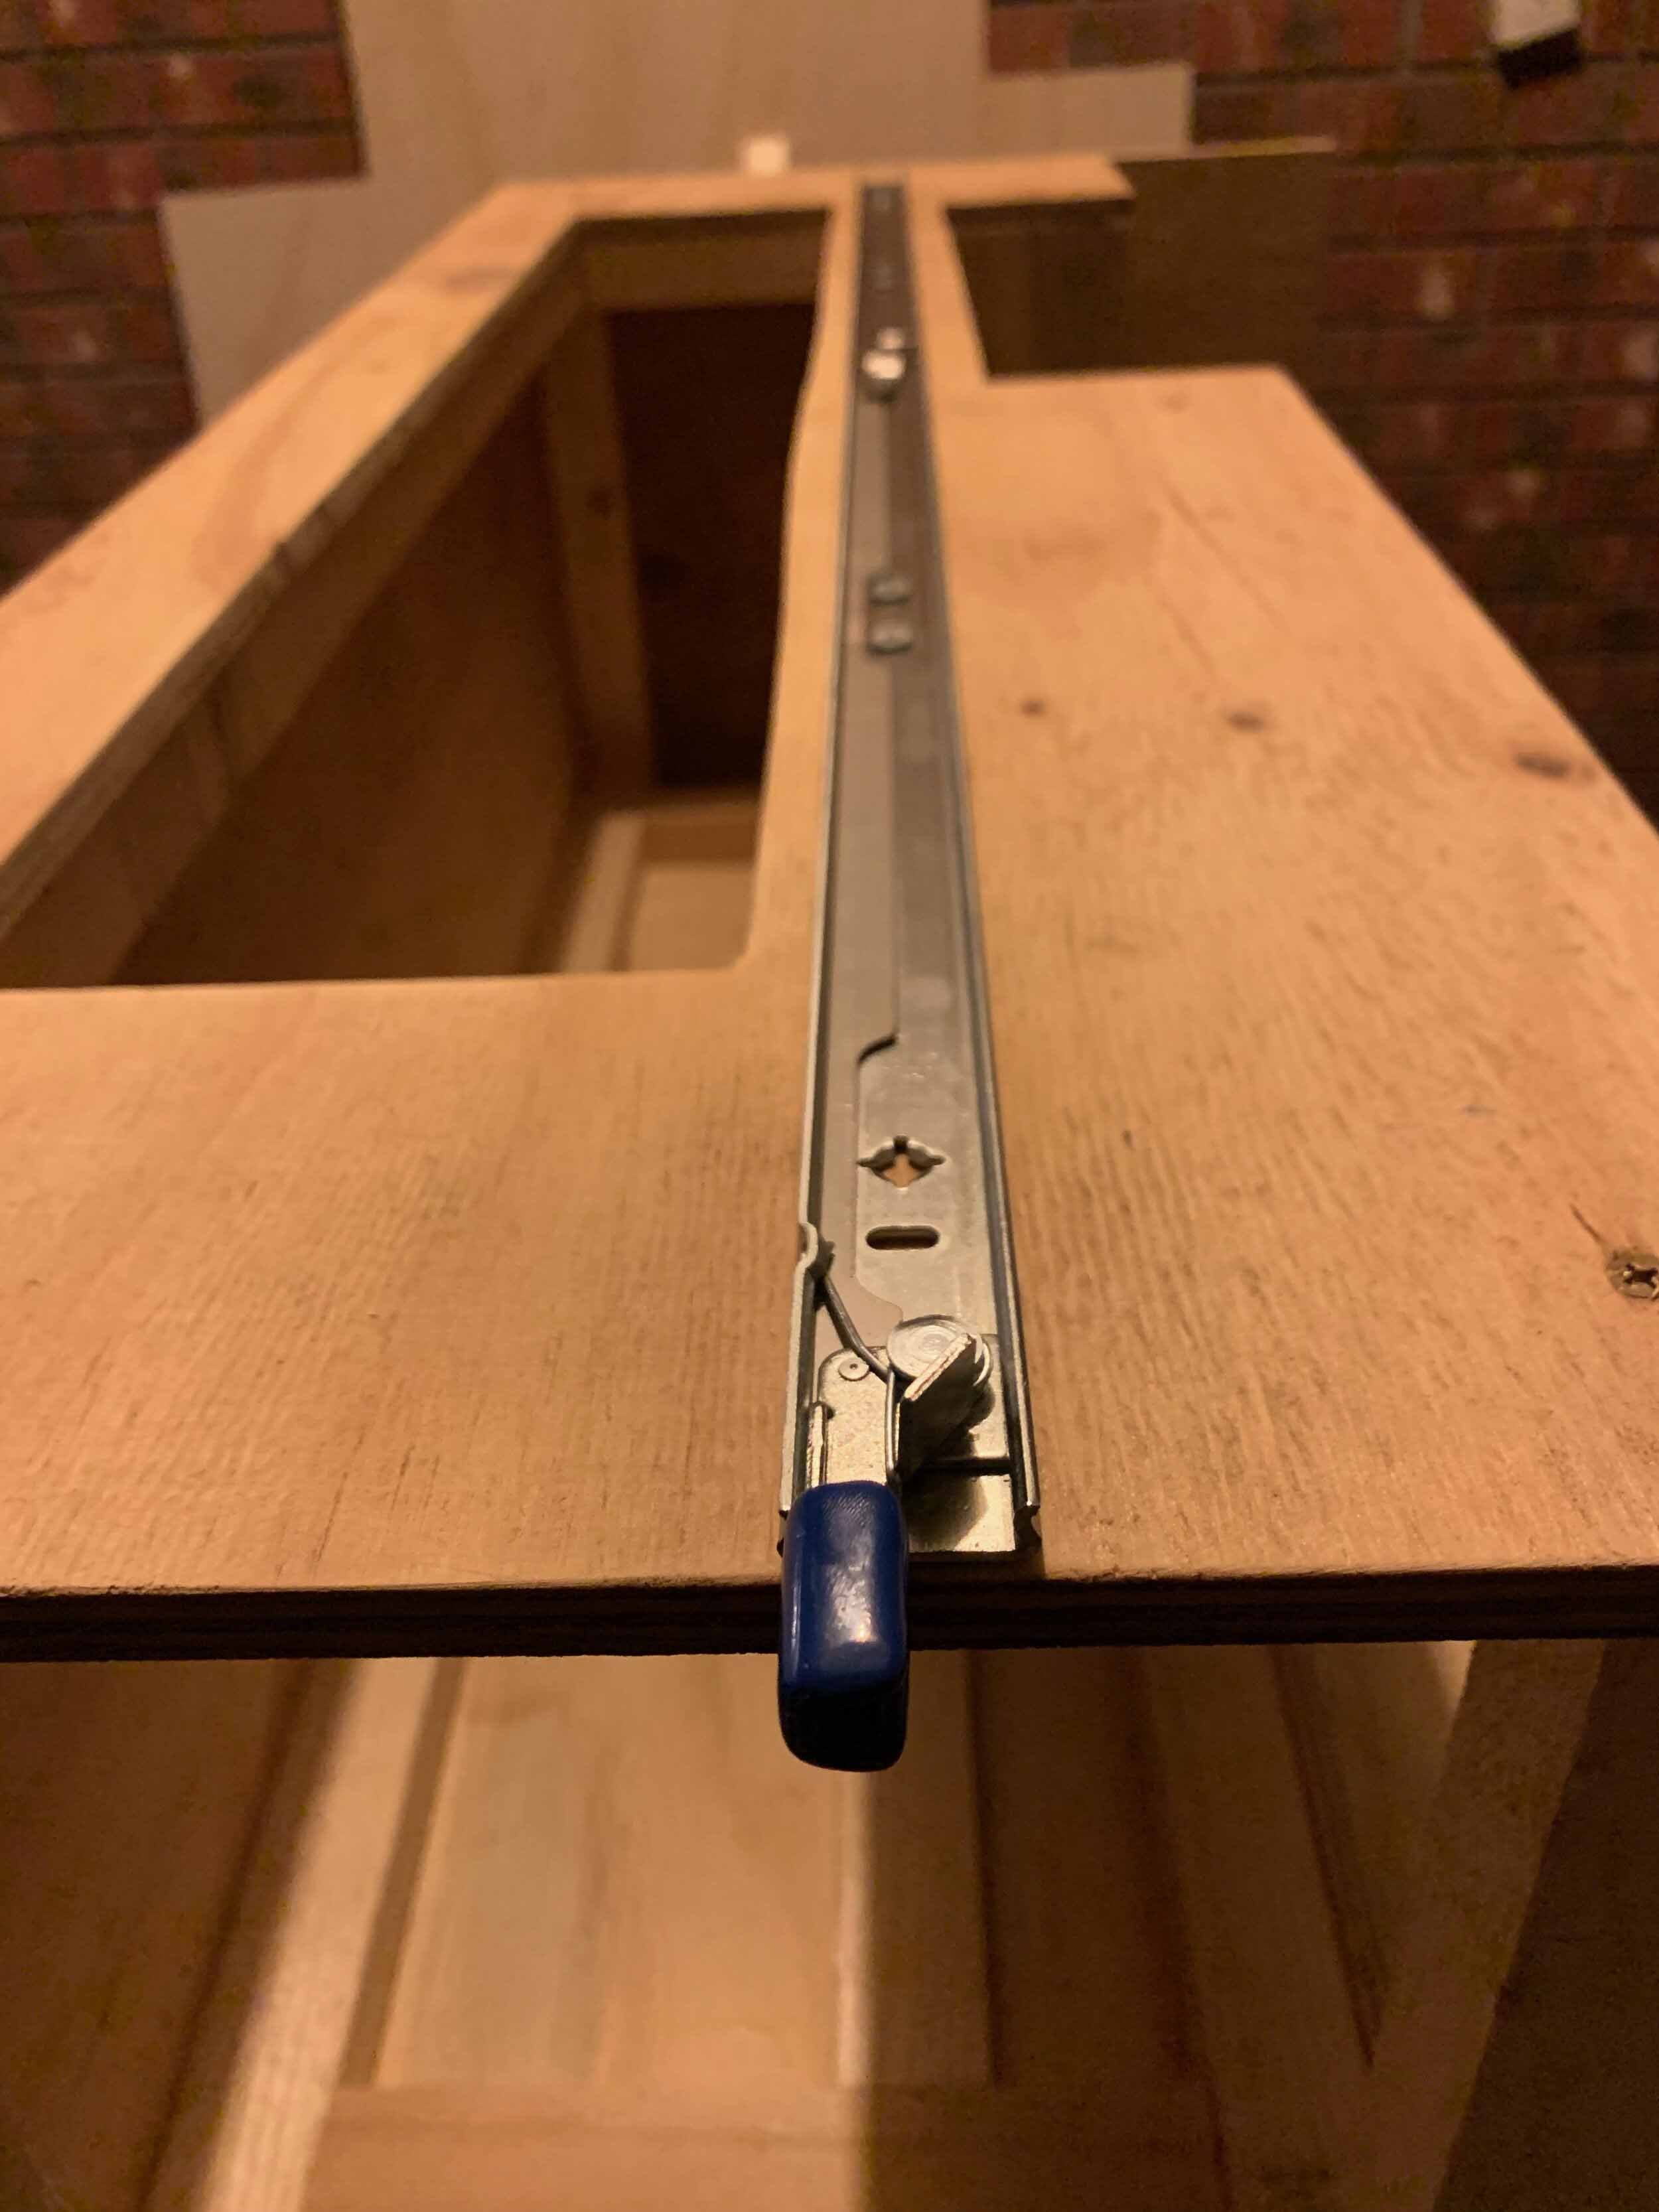
Next it was time for the kitchen, for this we decided to utilise the empty space beneath the bed. We found heavy duty 90kg lockable draw sliders from Bunnings which were able to extend over 1.2 meters. This length allowed enough space for us to be able to install a single stove cooker which we lowered into the flat top and a collapsible sink, whilst still allowing room underneath for storage. The draw it self we made from the remaining timbers we used for the bed plus 1200mm x 1198mm x 12mm timber sheet (project panels) for the top, bottom and sides. We made the draw slide out from the righthand side of the van allowing us to be able to cook from underneath the boot door giving us more protection from the weather. We also used the project panel to finish off the left hand side of the bed, by making a hinging panel which acted as a storage door and a table when extended outwards. (the full quantity and cost listing is below):
Boarding up
Finally for the finishing touches we decided to use very thin plywood which was 1200mm x 810mm x 3mm to cut out shapes to hide all the exposed timber framing and to give it a nice natural wood finish. We left the right hand side underneath the bed exposed to allow us space and access being the slide out kitchen and to utilise it for storage. We also finished of the inside of the van either side of the fold up table with inverted bookshelves for storage and appeal. (the full quantity and cost listing is below):
1200 x 810 x 3mm project panel we got from Bunnings - $13
Total Costing: $13
Decor
The final decoration of the van was the most important, as we needed the decor to be practical as well as complement all the features we had already installed. Jess arranged a collage of pictures showcasing different types of colours and materials that would fit with our own vision. After deciding on the colour scheme and general aesthetic we went out and purchased what we needed. Bellow is the list of materials and items we used:
3m of Sand coloured linen fabric from Spotlight which Ryan was able to sew into curtains to cover the five exposed windows. All the curtain rods were preinstalled from the previous owner, however you can pick that up from Spotlight as well.
The cushions we purchased from Wheel&Barrow to cover the 2 stalls, the cushions we bought were designed for dining chairs, which we cut off the ties and use that material to tie up the curtains when they are not in use.
To decorate the bookshelves Jess purchased a number of travel books from an op shop which also came in very handy for those long days on the road. We utilised Jess’s spare linen quilt which fit perfectly with our theme. We also purchased a map from the RAA shop that jess got laminated from Officeworks, so that we could easily map out our trips and also record our previous trips.
Lastly the rug we purchased from a furniture store, we thought it would be a good idea to have as it would reduce the dust and dirt collected on the hard wood flooring as well as add some extra comfort.
(the full quantity and cost listing is below):
3 x meters of linen fabric from Spotlight - $10-$30 meter
Cushions from Wheel&Barrow - $24 for both
The map from RAA - $8
Kmart accessories - $40
Mirror from BigW - $7
Rug from furniture store - $30
Total Costing: $ 199
Summary
This project was one of the best decisions we made, we honestly can’t go anywhere without taking Marla. She works so practically with our lifestyle and allows us to explore anywhere comfortably overnight. In total the project cost approximately $3,680 including the purchase of the van. However in saying that she has had some mechanical work done since our trip which must be considered as well when factoring in the total amount spent. Plus we haven’t as of yet set up a fully functioning battery to power the van, however we did purchase solar panel which we are able to use when we are stopped. We are extremely happy with the final result and we are glad we made her part of our family. Let us know what you think in the comments, and we would love to hear your van build story.
Thanks for reading
Love, Jess and Ryan @takeus_withyou


